How to Sterilize Knife: Methods You Can Trust
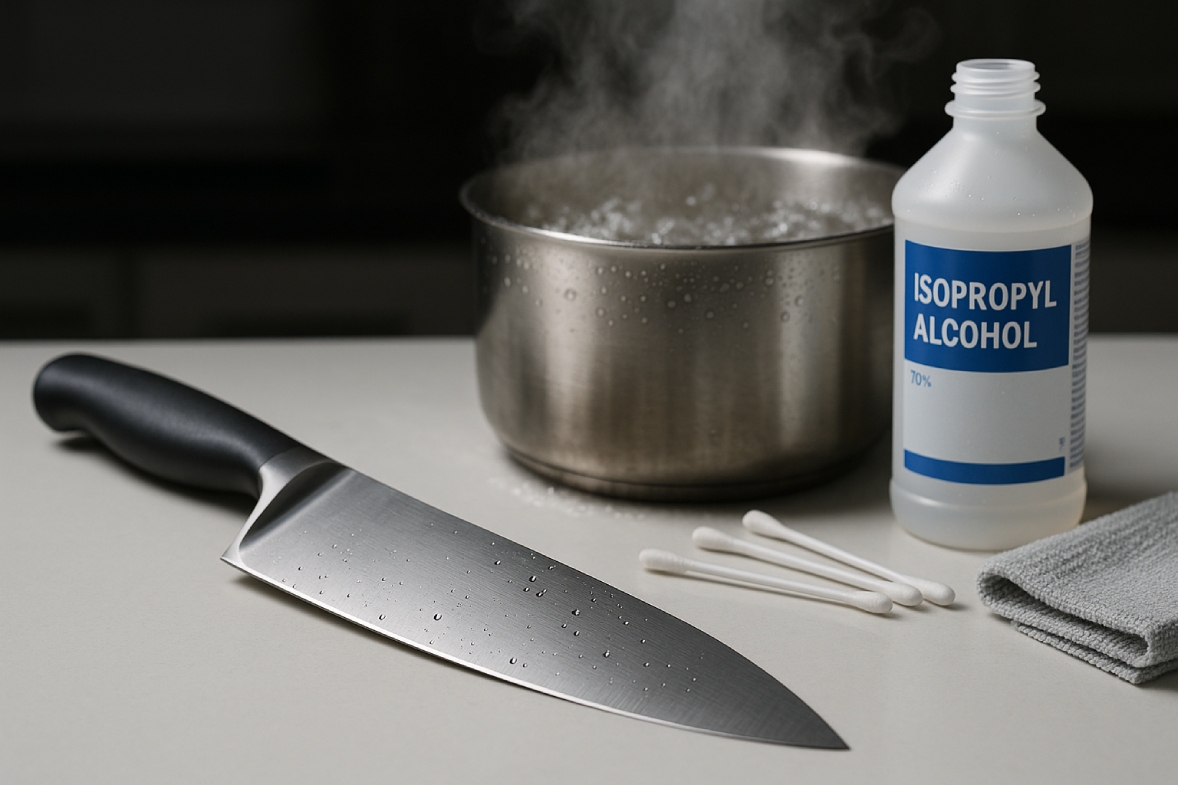
To sterilize your knife, start by cleaning it with hot water and mild detergent to remove debris. Then, use heat-based methods like boiling it in water for 10 minutes or an autoclave at 250°F for 15 minutes.
Alternatively, immerse it in a 70% isopropyl alcohol solution for 1-5 minutes. Rinse thoroughly after chemical use to avoid residue.
Stick around to uncover more advanced techniques and safety tips for effective sterilization.
Key Takeaways
- Clean the knife with hot water (≥60°C) and detergent to remove debris before sterilizing.
- Submerge in boiling water for 10 minutes or use an autoclave at 250-254°F for 15-30 minutes.
- Use chemical disinfectants like 70% ethanol with 1-5 minutes of immersion for effective sterilization.
- Consider UV-C light for 30-second cycles on exposed knife surfaces as a cold sterilization option.
- Wear gloves and goggles to protect against chemical fumes or heat during the process.
Essential Tools for Knife Sterilization
Before you begin sterilizing a knife, make sure you’ve gathered the essential tools to do the job safely and effectively.
Start with chemical agents like a bleach solution (1 tbsp per gallon of water) and 70% isopropyl alcohol for disinfecting blades and handles. Grab mild detergent to remove debris first.
Equip yourself with cleaning tools such as non-abrasive nylon brushes for scrubbing joints and microfiber cloths for residue removal.
Don’t forget disposable gloves and eye protection to handle chemicals safely. Investing in proper sterilization equipment ensures compliance with hygiene standards like Regulation (EC) No 852/2004.
Set up a three-compartment sink or basin for a wash-rinse-sanitize workflow. Use spray applicators for even disinfectant distribution.
Heat-Based Sterilization Techniques
Engage in heat-based sterilization techniques to guarantee your knife is free from harmful microbes.
Start with flame sterilization by briefly passing the blade over an open flame, targeting edges first, then flat surfaces. Don’t overheat to protect the temper, and let it cool naturally.
Alternatively, submerge the blade in boiling water for at least 10 minutes, adding 1 tsp of baking soda per quart to boost effectiveness; dry immediately to avoid corrosion.
For superior results, use an autoclave with pressurized steam at 250-254°F for 15-30 minutes, ensuring proper wrapping and indicators to confirm success.
Chemical Disinfection Methods
Let’s shift focus from heat-based sterilization to another powerful approach: chemical disinfection methods for your knife.
Start by thoroughly cleaning your knife with hot water (≥60°C) and detergent to remove organic debris, then air-dry it to prevent chemical dilution.
Choose a disinfectant like 70% ethanol for quick action against bacteria or sodium hypochlorite (100–200 ppm) for broader pathogen control, ensuring 1–5 minutes of contact time via full immersion.
Agitate to cover crevices, and use test strips to confirm concentration. Remember to wash knives thoroughly after each use to maintain hygiene and prevent contamination after each use.
Wear gloves and goggles when handling concentrates, and avoid mixing chemicals to prevent toxic reactions.
Post-treatment, rinse if residues like chlorine remain.
Validate efficacy with microbiological swabbing, noting that spore-forming bacteria may resist standard solutions.
Innovative Cold Sterilization Options
Explore five cutting-edge approaches to cold sterilization that can effectively sanitize your knife without relying on high heat.
First, try ozonated water sterilization by submerging your knife in ozone-infused water using an ozone generator and basin; it’s residue-free and targets various pathogens.
Second, consider glow discharge plasma activation, where you activate salt solutions like NaCl with plasma for a quick, under-one-minute cycle at ambient temperature.
Third, use UV-C radiation disinfection with 253.7 nm lamps for a 30-second cycle, handling up to three knives with consistent, chemical-free results.
Fourth, opt for a cold chemical-hot water hybrid, submerging knives in a chemical solution below boiling. For enhanced effectiveness, ensure thorough cleaning of blades with suitable agents before disinfection to remove dirt deposits suitable agents cleaning.
Step-by-Step Cleaning Process
Before you start sterilizing your knife, gather all essential supplies like mild dish soap, warm water, a non-abrasive sponge, and a clean towel for drying.
Make sure you’ve got sanitizing solutions or equipment ready, such as diluted bleach or a high-temp dishwasher, to complete the process.
Focus on key areas during cleaning, especially the blade, joints, and handle, to eliminate all debris and prevent contamination.
Gather Essential Supplies
Start by collecting the necessary supplies for sterilizing your knife effectively. You’ll need access to clean water for rinsing and soaking.
Grab a mild detergent to safely clean without damaging the handle. Have soft cloths or sponges ready to wipe down the knife without scratching it. Secure a sterilizing solution, like bleach or vinegar, for sanitization.
Additionally, consider using sterilization equipment such as a knife sterilizer box or a heating element for thorough results. Investing in a hot water knife steriliser can ensure effective pathogen elimination for maintaining hygiene.
Ensure you’ve got protective gear on hand too. Wear gloves to shield your hands from harsh chemicals, and use eye protection to avoid splashes.
Focus on Key Areas
Precision is key when sterilizing a knife, so focus on the critical areas during the step-by-step cleaning process. Target the blade edge, handle joints, and textured areas where bacteria hide.
You’ve gotta be meticulous—rinse under warm water, remove debris with a cloth, and use mild dish soap to break down oils. For enhanced disinfection, wipe the knife with a cloth moistened with isopropyl alcohol to ensure germs are effectively eliminated.
Don’t skip hidden spots; inspect crevices thoroughly to guarantee safety. Remember to check for any signs of rust, as rusty knives can harbor harmful bacteria and pose health risks.
Feel the weight of responsibility as you clean with these crucial focus points:
- Blade Edge: Scrub carefully to kill germs without dulling.
- Handle Joints: Dig into gaps where contaminants lurk.
- Serrated Sections: Use a soft-bristle brush for precision.
- Raw Meat Knives: Prioritize to stop cross-contamination risks.
Safety Guidelines for Sterilization
When sterilizing a knife, always handle chemicals with care by wearing protective gloves and ensuring proper ventilation to avoid harmful exposure.
Keep flammable sterilizing agents away from heat sources to prevent fire hazards during the process.
Protect your knife’s materials by avoiding harsh abrasives or excessive heat that could damage the blade or handle.
Ensure you clean and sanitize the knife after cutting raw meats to prevent cross-contamination and the spread of harmful bacteria like Salmonella and E. coli.
Handle Chemicals Safely
How can you guarantee safety while handling chemicals during knife sterilization? You must prioritize caution and follow strict protocols to protect yourself.
Wear gloves, goggles, and masks to shield against burns and fumes. Mix disinfectants in ventilated areas, stick to recommended dilution ratios, and read labels carefully before use. Store chemicals per manufacturer guidelines and clean spills immediately with absorbent materials. Be aware that chemical sterilization can pose risks of corrosion or damage to equipment if not handled properly.
Feel the weight of responsibility with these critical safety steps:
- Guard your health – Don’t let fumes or splashes harm you; gear up fully.
- Prevent disaster – Handle spills fast to avoid dangerous exposure.
- Stay precise – Wrong mixtures can hurt; follow ratios exactly.
- Secure storage – Keep chemicals sealed to stop accidental leaks.
Prevent Fire Hazards
As you commence on sterilizing your knife, prioritize preventing fire hazards by carefully selecting your methods and materials. Avoid using isopropanol due to its rapid burn rate and high evaporation risk. Instead, opt for ethanol, which burns slower and offers a safer sterilization option.
Use ethanol wipes for a fire-free method, and confirm your workspace is clear of flammable materials. Additionally, consider that ethanol is often preferred in some regions like Germany for its lower cost compared to alternatives.
Here’s a quick reference for safe sterilization practices:
| Method | Fire Risk | Safety Tip |
|---|---|---|
| Ethanol Wipe-Down | Low | Keep away from sparks |
| Isopropanol Use | High | Avoid due to rapid ignition |
| Open Flame | Very High | Use only as last resort |
Protect Knife Materials
Before you start sterilizing your knife, guarantee you’re protecting its materials by following specific safety guidelines.
Don’t risk damaging your trusted tool—handle it with precision and care during sanitation. Use mild detergents and non-abrasive cloths to avoid scratches. Rinse immediately after using diluted bleach solutions (1 tbsp per gallon of water) to prevent chemical damage, and dry thoroughly to stop corrosion on carbon steel blades.
To safeguard your knife, remember these critical steps that’ll keep it in top shape:
- Avoid extreme heat—don’t use water over 82°C unless specified, as it can ruin handles.
- Protect handles—never soak wooden ones to prevent cracking.
- Dry pivot points—stop rust in folding knives.
- Store dry—moisture’s your enemy, so keep it away!
Evaluating Cost and Environmental Impact
Why should you consider both cost and environmental impact when choosing a knife sterilization method?
You’re balancing budget and sustainability. Assess initial costs—UV sterilizers range from $79 to $1,299—against maintenance expenses like replacing lamps.
Compare energy consumption; UV and ozone systems use less power than hot water or autoclave methods. Use cost calculators to evaluate long-term feasibility based on usage frequency.
On the environmental side, prioritize low-impact options. Hot water sterilizers guzzle water, while chemical agents like chlorine harm ecosystems.
When considering environmental impact, avoid hot water sterilizers that waste water and chemical agents like chlorine that damage ecosystems.
Opt for UV or ozone-based systems for minimal energy and water use. Choose sterilizers with sustainable materials like stainless steel to reduce waste. Consider compact designs like those with dimensions of 9 x 6.5 x 7.625 inches for easy storage.
Frequently Asked Questions
How Often Should Knives Be Sterilized?
Picture your knife as a silent battlefield, teeming with invisible enemies after every cut. You’ve gotta sterilize it after handling raw meats to stop pathogens dead in their tracks.
Do it between switching ingredient types, especially raw to ready-to-eat foods.
Sterilize post-sharpening to clear debris, after extended use for residue buildup, and before storage to lock out contaminants.
Stick to these intervals to guarantee safety and compliance.
Can Dishwashers Effectively Sterilize Knives?
Hey, you’re wondering if dishwashers can effectively sterilize knives. Let’s break it down.
Most home dishwashers don’t reach the 82°C needed to kill all pathogens, maxing out at 60-70°C. Food debris often shields microbes from heat and detergents, so true sterilization isn’t achieved—just sanitization.
For reliable results, pre-clean knives thoroughly, use a sanitize cycle if available, and consider boiling or chemical sanitizers for complete pathogen elimination.
Are There Risks to Knife Sharpness?
Picture your knife as a warrior, its edge a gleaming shield against culinary foes.
Now, consider the risks to its sharpness. You’ve gotta watch out for high temperatures that can distort the blade’s material, eroding its fine edge over time.
Frequent heat exposure slashes durability, and excessive temps can sap sharpness by affecting tempering.
Protect your blade—don’t let heat tarnish its strength or discolor its proud shine.
What’S the Best Storage After Sterilization?
Hey, when figuring out the best storage after sterilization, opt for UV sterilization cabinets like Helios™ for a 99% E. coli reduction in minutes.
You can also use dry, clean knife blocks with labeled slots for easy access.
Mount magnetic strips away from traffic zones, ensuring knives are fully dry to prevent rust.
Don’t forget edge guards to protect blades and specialized trays for medical-grade safety during storage.
How to Spot Contamination on Knives?
Imagine a knife as a silent battlefield, where invisible enemies lurk in every scratch.
To spot contamination, inspect closely for food residue—those tiny invaders clinging to the blade. Check for discoloration or rust, signs of neglect. Sniff for odd odors, a warning of hidden decay.
Examine the handle for cracks, potential hideouts for bacteria. Don’t overlook these clues; they’re your first defense against unseen threats waiting to strike.
Stay Sharp, Stay Safe: Your Sterilized Knife Is Ready for Action
You’ve now got the know-how to sterilize your knife like a pro! Don’t just clean it—obliterate every germ with ruthless precision using heat, chemicals, or cold methods.
Follow each step meticulously, prioritize safety, and weigh the cost and environmental impact. Treat this process like it’s life or death, ’cause in a way, it is—your health’s on the line.
Keep that blade spotless, and you’ll slice through any challenge unscathed.