How to Make Knife Sharpener Using DC Motor at Home: Easy DIY Guide
To make a knife sharpener using a DC motor at home, gather essential components like a suitable motor, a base (cardboard or wood), an on/off switch, and a sharpening stone or wheel.
Assemble the motor and sharpening mechanism securely, ensuring alignment. Connect the motor to a power supply, ensuring compatibility with your motor’s voltage.
Prioritize safety by wearing protective gear. Follow the assembly steps carefully for ideal functionality, and discover effective tips for enhancing your sharpener’s performance.
Key Takeaways
- Select a suitable DC motor (3V or 9V) with adequate torque for effective knife sharpening.
- Create a sturdy base using cardboard or wood, ensuring the motor and sharpening mechanism are securely attached.
- Connect the motor to a power source, using safe wiring and insulation, and include an on/off switch for control.
- Use a sharpening stone or wheel, secured with spacers like bottle caps, for optimal sharpening performance.
- Regularly maintain and replace abrasives to ensure the sharpener operates efficiently and effectively.
Materials Required for Your DIY Knife Sharpener
When you’re ready to create your DIY knife sharpener, gathering the right materials is essential for ensuring functionality and safety.
You’ll need a suitable DC motor, either 3V or 9V, paired with corresponding batteries. For stability, use cardboard or wood to form the base, and secure components with hot glue or epoxy.
An on/off switch will provide motor control. Additionally, ensure that your design allows for consistent sharpening to achieve optimal results.
For the sharpening action, select a sharpening stone or wheel, and consider using bottle caps as spacers.
Don’t forget electrical components: copper wires, connectors, and possibly a PWM board for speed control.
Ensure you gather essential electrical components like copper wires, connectors, and consider adding a PWM board for optimal speed control.
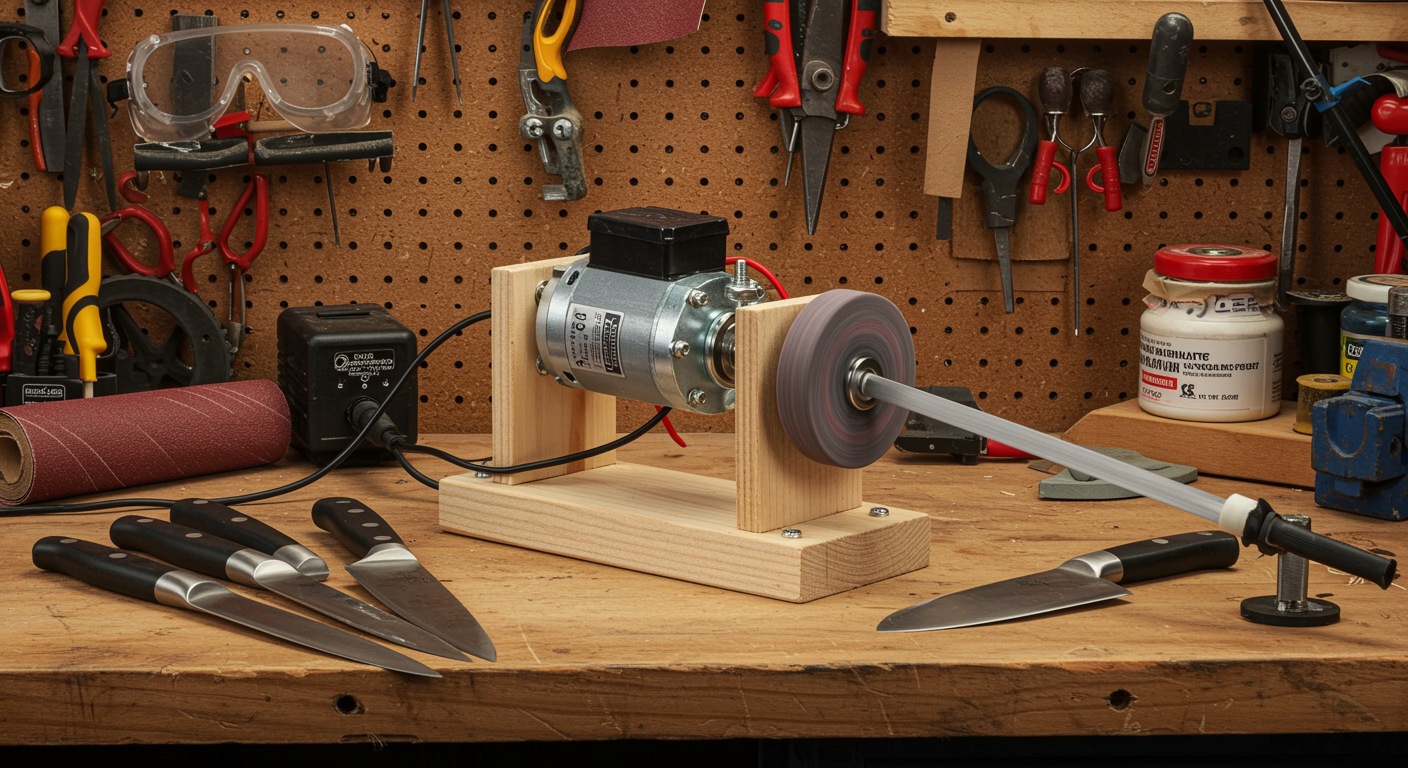
Step-by-Step Assembly Process
With your materials gathered, the assembly process for your DIY knife sharpener can begin. Follow these structured steps to guarantee a successful build:
- Motor Selection: Choose a DC motor with suitable voltage and torque. Electric pencil sharpener machines utilize geared DC motors for efficient operation.
- Sharpening Mechanism Design: Create a mechanism using durable materials for the sharpening surface.
- Assembly of Components: Securely attach the motor and mechanism, guaranteeing alignment and balance.
- Electrical Connections: Connect the motor to your power source, guaranteeing safe wiring and insulation.
- Final Assembly and Testing: Add final components, then test the sharpener with a dull knife for functionality.
Safety Precautions to Consider
Guaranteeing safety while operating your homemade knife sharpener is essential, as improper use can lead to severe injuries or accidents. Keep these precautions in mind:
| Safety Aspect | Precautions | Notes |
|---|---|---|
| Proper Apparel | Avoid loose clothing that can entangle | Wear fitted clothing |
| Eye Protection | Use ANSI-approved safety glasses | Prevents eye injuries |
| Mental Alertness | Stay focused and alert | Avoid distractions |
| Authorized Use | Allow only trained individuals to operate | Supervise inexperienced users |
Additionally, guarantee your workspace is clear of clutter and well-lit. A sharp knife enhances kitchen safety and efficiency, so always disconnect power before maintenance and check for damages.
Power Supply Options for Operation
Operating your homemade knife sharpener efficiently requires a reliable power supply. You have several options to choose from:
- AC to DC Conversion: Use a power supply unit (PSU) that matches your motor’s voltage, like 12V.
- Battery Power: A rechargeable battery pack offers portability; make certain it has enough capacity for extended use.
- Motor Selection: Choose a DC motor with voltage ratings compatible with your power source.
- Energy Efficiency: Select efficient components to minimize power consumption and prolong battery life. A safe running 24V DC motor operates at less than 80 dB, ensuring a quieter sharpening experience.
- Component Selection: Confirm all parts, such as resistors and fuses, fit your power needs.
Tips for Performance Optimization
To achieve ideal performance from your homemade knife sharpener, focus on critical factors such as motor efficiency, material selection, and ergonomic design.
Start by selecting a high-efficiency DC motor to enhance sharpening precision while minimizing power consumption. Implement a PWM board for smooth speed control, allowing you to adjust motor speed as needed.
Additionally, consider integrating cordless sharpening technology for increased portability and convenience.
Choose durable materials for the sharpening tool to guarantee longevity, and incorporate high-quality abrasives like diamond stones for effective results.
Safety features are essential; install guards and emergency stops to prevent accidents.
Ergonomically design handles for comfortable use and include adjustable angles to accommodate various knife types.
Frequently Asked Questions
What Type of Knives Can This Sharpener Handle?
Your sharpener can handle various knife types effectively.
For instance, if you have a chef’s knife, its straight edge makes it compatible with most electric sharpeners. You’ll find that a high-carbon stainless steel knife benefits from the adjustable angles, allowing you to maintain ideal sharpness.
However, remember that serrated knives require specialized tools, as they need to preserve their unique edge structure during the sharpening process for best performance.
How Long Does It Take to Sharpen a Knife?
Sharpening a knife typically takes you between 5 to 10 minutes, depending on your technique and the knife’s condition.
If you’re reprofiling a blade to a sharper angle, expect to spend 30 to 60 minutes.
Factors like steel hardness and the number of strokes required can greatly impact this time.
With practice, you’ll notice your sharpening efficiency improves, allowing you to achieve a finely honed edge more quickly than before.
Can I Use This Sharpener for Other Tools?
Absolutely, you can use this sharpener for various tools.
In fact, studies show that regular tool maintenance can increase their lifespan by up to 30%. This sharpener’s versatility allows you to sharpen kitchen knives, chisels, and even screwdrivers effectively.
Is There a Risk of Overheating the Knife?
Yes, there’s a significant risk of overheating the knife during sharpening.
If the motor runs too long or at excessive speeds, it generates heat that can soften the metal, compromising sharpness and durability.
To mitigate this, you should incorporate thermal protection devices and cooling systems into your design.
Additionally, monitor the temperature and allow cooling intervals to guarantee the knife maintains its integrity and sharpness throughout the sharpening process.
How Do I Clean the Sharpening Stone?
Cleaning your sharpening stone is essential, much like a blacksmith tending to their forge.
Start by applying WD-40 or honing oil to lift away metal flecks, using a soft brush in circular motions. Rinse the stone under running water, avoiding soap to prevent damage.
For diamond stones, use a high polymer eraser or hot soapy water with a nylon brush.
Regular maintenance guarantees the stone remains effective and ready for sharpening.
Keep Your Blades Sharp and Your DIY Spirit Sharper
To sum up, creating a knife sharpener using a DC motor at home can be as satisfying as honing a blade to a keen edge.
By following the outlined steps and adhering to safety precautions, you’ll not only enhance your knife’s performance but also gain valuable hands-on experience.
With the right materials and a solid understanding of power supply options, you’ll achieve an efficient and effective sharpening tool, ensuring your knives remain sharp and ready for any culinary challenge.